Playing with Nomad from HashiCorp
Overview
I’ve been thinking about experimenting with a new workload scheduler for a long time. I have two main use cases when thinking about a scheduler - deploying/scaling all the microservices we run, and one-off things like a Kafka consumer that needs to scale with demand. Recently, I’ve used Kubernetes, but have always wanted to try something a little less “opinionated.” Some problems I have/had with Kubernetes:
- Docker is required - this means we need to change the way we package all of our applications (right now we use a jar file)
- Networking - can be complicated, and adds yet another layer of abstraction that my team wouldn’t have as much insight to
- Kubernetes deployment/hosts are owned by another team (we won’t get as much insight into the configuration)
Since my team almost solely builds standalone jar files, I have been looking to try something that can run these jar files directly. I would like this tool to also run Docker containers, binaries, or anything else we eventually need. This brought me to Mesos/Marathon and Nomad. Since I’m a heavy user of other HashiCorp tools - Vault and Consul namely - I decided to try out Nomad. Here are a few reasons why I chose to research Nomad:
- familiarity with other HashiCorp tools (personally) and direct integration with HashiCorp tools (Consul)
- ease of setup, allows our team to own the underlying server config, deployment, etc.
- runs jar files natively, along with any binary, docker containers, etc.
I spent some time the last few weeks playing with Nomad, and running some jobs. This post aims to explore how I configured Nomad, provide a sample job file, and list my thoughts overall.
Nomad Servers
Nomad, like Consul, is distributed with server and client nodes. I started by configuring the server nodes. This turned out to be very straightforward - especially since I was familiar with Consul. HashiCorp recommends running Nomad with automatic bootstrapping - this means utilizing an existing Consul cluster so the Nomad nodes can discover them. This worked as advertised - I ran Nomad in server mode on the same (don’t do this for prod!) nodes as my Consul server and no additional configuration was needed. Nomad understands if a Consul agent is running and will automatically try and connect to it. I won’t go in to detail on setting up Consul Server - that can be another blog post. I do want to post the output from consul members to show you how the servers are connected:
Node                  Address               Status  Type    Build  Protocol  DC
danny-nomad-server-1  192.168.198.114:8301  alive   server  0.9.2  2         dc1
danny-nomad-server-2  192.168.198.112:8301  alive   server  0.9.2  2         dc1
danny-nomad-server-3  192.168.198.113:8301  alive   server  0.9.2  2         dc1
Once I validate my Consul servers were working as expected, I moved on to installing Nomad. The first step was downloading the binary. Here are the commands I ran in order to pull the binary:
wget https://releases.hashicorp.com/nomad/0.6.2/nomad_0.6.2_linux_amd64.zip
unzip nomad_0.6.2_linux_amd64.zip

# make a data directory for Nomad
mkdir /etc/nomad/nomad-data
The next step was creating the Nomad configuration file, config.hcl. This is a simple file, especially since I am using Consul for service discovery. The file looks like this:
data_dir = "/root/nomad/nomad-data"
server {
  enabled          = true
  bootstrap_expect = 3
}
This file tells Nomad it will be in server mode, and to expect a total of 3 other servers. This means a single Nomad server won’t be ready until it contacts 2 other servers to form a quorum.
You can run Nomad with the following command: ./nomad agent -config config.hcl
Once all 3 servers are started, you can validate their status with ./nomad server-members. Remember: the Nomad servers will automatically use Consul in order to discover other Nomad servers. There shouldn’t be anything you need to do for them to discover each other.
The output of this command should look something like:
[root@danny-nomad-server-1 nomad]# ./nomad server-members
Name                         Address          Port  Status  Leader  Protocol  Build  Datacenter  Region
danny-nomad-server-1.global  192.168.198.114  4648  alive   true    2         0.6.0  dc1         global
danny-nomad-server-2.global  192.168.198.112  4648  alive   false   2         0.6.0  dc1         global
danny-nomad-server-3.global  192.168.198.113  4648  alive   false   2         0.6.0  dc1         global
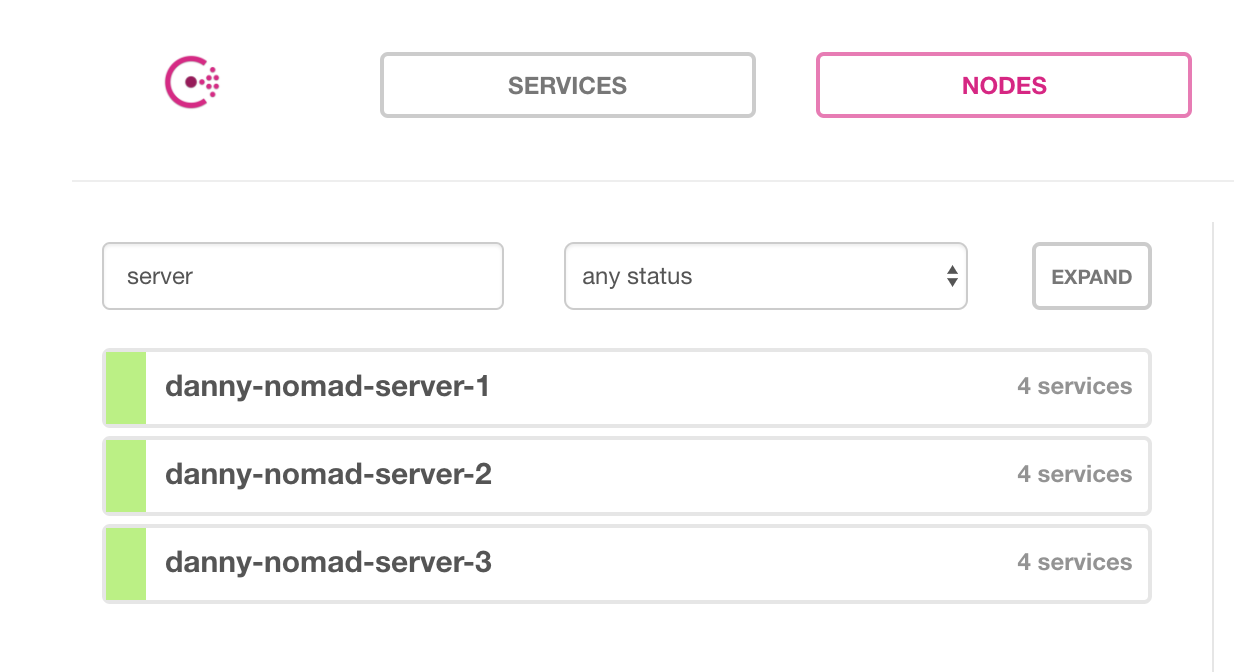
Alternatively, if you’re using Consul, Nomad automatically registers itself as a service. If we check the Consul UI, there should be Nomad servers:

Nomad client
Now we have 3 Nomad servers running - we need some clients to deploy to. Nomad clients are what actually run the jobs - meaning they will need whatever language/container/app installed to run your code. In my case, since I am deploying jars, Java must be installed on all the Nomad clients. I created the clients the same way as the Nomad servers. Again, with a Consul agent running on each node, service discovery “just works.” Nomad clients will discover the servers and join the cluster automatically. The Nomad client binary is the same as the server, only the configuration file (config.hcl) is different.
Download the binary using the commands above, and then create a new config file:
# Increase log verbosity for testing/debugging
log_level = "DEBUG"

# Specify the Nomad client data directory
data_dir = "/root/nomad/nomad-data"

# Set Nomad to client mode
client {
    enabled = true
}
Install Java (later in this post, I talk about how this could be better done as a system job):
sudo yum install -y java
Starting Nomad is the same command as before: ./nomad agent -config config.hcl
Once the clients start, we can validate by running ./nomad node-status on a Nomad server. This will list all of the clients that have been created:
ID        DC   Name                  Class   Drain  Status
5e23e443  dc1  danny-nomad-client-2  <none>  false  ready
3dd8b80d  dc1  danny-nomad-client-3  <none>  false  ready
dcd4f3c6  dc1  danny-nomad-client-1  <none>  false  ready
d8d150b1  dc1  danny-nomad-client-4  <none>  false  ready
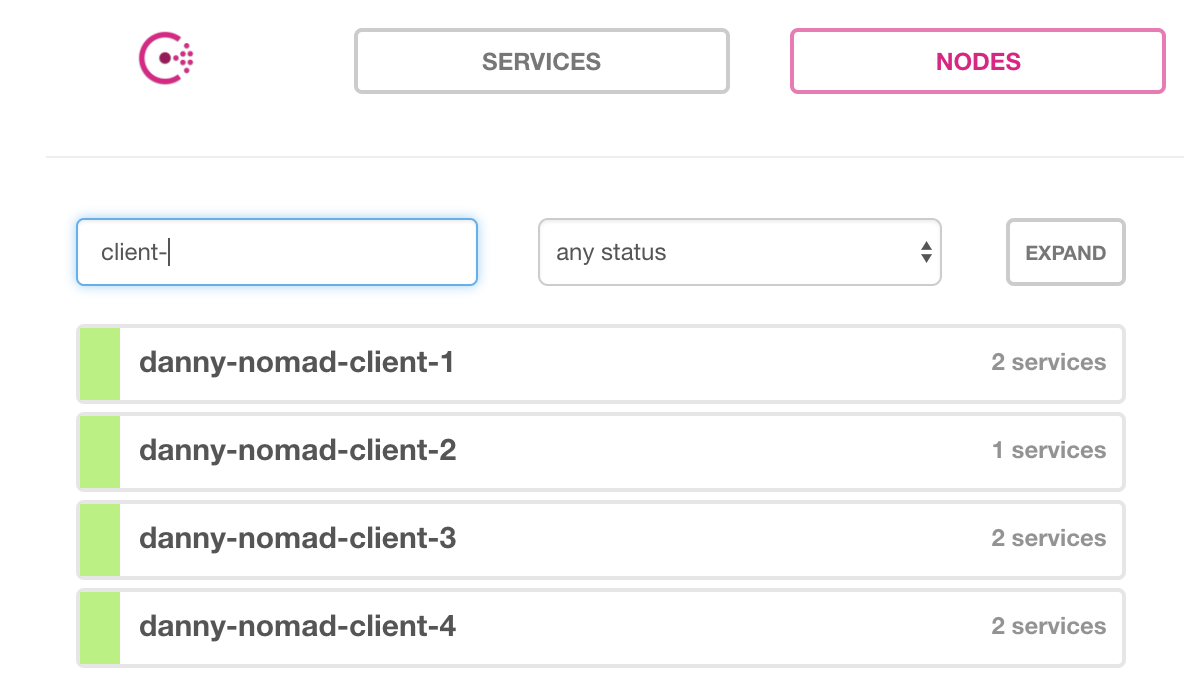
Like before, we can also check Consul, since Nomad will automatically register itself:

Running a job
Now that we have an actual Nomad cluster, it’s time to run some jobs! I had two use cases that I wanted to validate - running a jar file, and running a Kafka consumer. I won’t cover the Kafka consumer piece in this blog (maybe a separate post) so let’s focus on the jar.
The job specification file can be overwhelming at first, so I will walk through mine line-by-line. Some of this may change as well, as I continue to learn Nomad. Nomad breaks jobs in to 3 categories:
- job
- top-most Nomad config
- globally unique
- group
- defines everything that should run on a single client
- task
- actual tasks to run (download artifact, run jar, etc.)
To start with, I will cover my job-level configuration. Here is my config:
job "api-v3" {
  region = "global"
  datacenters = ["dc1"]
  type = "service"
  update {
    max_parallel     = 1
    canary           = 1
    min_healthy_time = "30s"
    healthy_deadline = "10m"
    auto_revert      = true
  }
Let’s go through this, line-by-line.
job "api-v3" {: Defines the job name. This must be unique across the cluster.region = "global": Defines the region to use. If you were in AWS, GCP, or another cloud, this would take affect. Global is the default, and means run in all.datacenters = ["dc1"]: defines the datacenter to run in. In my examples above, I didn’t set a datacenter in Consul or Nomad, so the default datacenter isdc1type = "service": Defines the Nomad scheduler to use. Service will be the most common. Since I wanted to install Java across on all my nodes, I could use the system type, for example. This means the job runs on all existing Nomad clients, and any new client that joins the cluster.
The next line, update defines the job’s update strategy This allows me to do things like canary deployments and blue/green. The docs explain these lines well, so I won’t go in to detail on them. One thing to note is this will also affect system jobs. If I used a system job to install Java, I could also do a canary deployment of the latest Java version.
Now to the group level config:
group "api" {
  count = 1
My config is very simple - I am only specifying the number instances of the job I want running. This is called an allocation in Nomad. In my example above, I have 4 clients. If I wanted my api to run on every client in this example, I’d have to specify a minimum of 4 in order for it to run on all clients (assuming no other tasks, and they had the resources)
The last stanza, task, is where most of the code lies. This is also where I tell Nomad what to run. Here is the code:
task "jar" {
    driver = "java"
    config {
      jar_path = "local/barcodes.jar"
      jvm_options = ["-Xmx256m", "-Xms256m", "-Dserver.port=${NOMAD_PORT_http}"]
    }
    artifact {
      source = "https://path.to.your.artifact.com"
      options {
        checksum = "md5:f498d94845fea754bfff90b3583a214f"
      }
    }
    service {
      port = "http"
      check {
        type     = "http"
        path     = "/health"
        interval = "10s"
        timeout  = "2s"
      }
    }
    env {
      "TEST_ENV" = "danny"
    }
    resources {
      cpu    = 500 # MHz
      memory = 512 # MB
      network {
        mbits = 100
        port "http" {}
Now, to explain this line-by-line.
task "jar": This is the name of the task. I called it ‘jar’ because I’m downloading the jar and running it, but you can name it whatever you like.driver = "java": Tells Nomad what driver to use.config: defines the driver config.jar_path = "local/barcodes.jar": where the jar is located. By default, Nomad will download to a relativelocaldirectory that can be used.jvm_options = ["-Xmx256m", "-Xms256m", "-Dserver.port=${NOMAD_PORT_http}"]: Standard Java options. One thing to note is I am using the Nomad Interpolation Syntax in order to specify the port my API binds to. Since there could be many instances of this API running on the same physical host, the port needs to be randomized (don’t worry - since we’re registering with Consul, it will keep track of the port as well.)
artifact: Tell Nomad to download an artifact. By default it downloads to a relativelocaldirectorysource = "https://path.to.your.artifact.com": The URL of the artifact to downloadoptions { checksum = "md5:f498d94845fea754bfff90b3583a214f" }: As a safety measure, the md5 sum of the artifact, to make sure we get the right file.
service: Tell Nomad to register our API as a Consul service. Like I mentioned above, the API will be running on a randomized port, so it’s important to register with some sort of service discovery.port = "http": What port to register the service with. This relates to theresourcesport that I will cover in a few lines.check: defines the Consul health check to use, along with the config.
-
env: This shows how to set environment variables. Long-term, I think I will configure most of my APIs with environment variables here. resources: the resources the task needs. important: This doesn’t limit your task, so it’s important to test and come up with an accurate measurement to prevent us from getting OOM killed, or Nomad killing the job. See more information herecpu: Amount of CPU the task needsmemory: amount of memory the job needsnetwork: how fast the network of the client should be, and how much the app will use.port: this tell Nomad to allocate a randomized port for the API. This is related to the Consul health check, as well as the variable I use in my Java arguments.
Let’s take a look at our full job file:
job "api-v3" {
region = "global"
datacenters = ["dc1"]
type = "service"
update {
  max_parallel     = 1
  canary           = 5
  min_healthy_time = "30s"
  healthy_deadline = "10m"
  auto_revert      = true
}
group "api" {
  count = 3
  task "jar" {
    driver = "java"
    config {
      jar_path    = "local/barcodes.jar"
      jvm_options = ["-Xmx256m", "-Xms256m", "-Dserver.port=${NOMAD_PORT_http}"]
    }
    artifact {
      source = "https://path.to.artifact/api.jar"
      options {
        checksum = "md5:f498d94845fea754bfff90b3583a214f"
      }
    }
    service {
      port = "http"
      check {
        type     = "http"
        path     = "/health"
        interval = "10s"
        timeout  = "2s"
      }
    }
    env {
      "TEST_ENV" = "danny"
    }
    resources {
      cpu    = 500 # MHz
      memory = 512 # MB
      network {
        mbits = 100
        port "http" {}
      }
    }
  }
}
}
We can now create a file on the server, api.nomad. This holds our entire job configuration. Now - the moment of truth. Let’s run our job. To be safe, we should do a couple things before running the job outright. We need to validate and plan our deployment. Validate makes sure the syntax of the job file is correct, and plan let’s us know exactly what Nomad is going to do. Let’s look:
[root@danny-nomad-server-1 nomad]# ./nomad validate api.nomad
Job validation successful
[root@danny-nomad-server-1 nomad]# ./nomad plan api.nomad
+ Job: "api-v3"
+ Task Group: "api" (1 create)
  + Task: "jar" (forces create)

Scheduler dry-run:
- All tasks successfully allocated.

Job Modify Index: 0
To submit the job with version verification run:

nomad run -check-index 0 api.nomad

When running the job with the check-index flag, the job will only be run if the
server side version matches the job modify index returned. If the index has
changed, another user has modified the job and the plan's results are
potentially invalid.
As you can see, our file is syntactically sound - and we can validate the outcome. We can see it will create 1 task group (and destroy none.) It also gives us a run command that we can use to make sure nobody else is running a deployment at the same time. Let’s go ahead and run it:
[root@danny-nomad-server-1 nomad]# ./nomad run -check-index 0 api.nomad
==> Monitoring evaluation "dbcc2539"
    Evaluation triggered by job "api-v3"
    Evaluation within deployment: "ba4c31c8"
    Allocation "f1826e28" created: node "d8d150b1", group "api"
    Evaluation status changed: "pending" -> "complete"
==> Evaluation "dbcc2539" finished with status "complete"
We get a successful output, and some task IDs. We need to keep track of these so we can check their status. At the most basic, we can check the job status with nomad status:
[root@danny-nomad-server-1 nomad]# ./nomad status
ID        Type     Priority  Status   Submit Date
api-v3    service  50        running  09/03/17 01:11:09 UTC
This shows that our deployment was successful (the running status indicates this.) We can also use the allocation ID above to get the allocation status - nomad alloc-status -short f1826e28:
ID                  = f1826e28
Eval ID             = dbcc2539
Name                = api-v3.api[0]
Node ID             = d8d150b1
Job ID              = api-v3
Job Version         = 0
Client Status       = running
Client Description  = <none>
Desired Status      = run
Desired Description = <none>
Created At          = 09/03/17 01:11:09 UTC
Deployment ID       = ba4c31c8
Deployment Health   = healthy

Tasks
Name  State    Last Event  Time
jar   running  Started     09/03/17 01:11:23 UTC
I won’t go through every command, the Nomad docs cover them much more thoroughly. I’ll leave you to explore the rest of the commands. You can look at the API logs, stop the job, and even drain an entire node.
To stop our job we can simply run nomad stop api-v3 and Nomad will clean everything up for us:
==> Monitoring evaluation "7e583065"
    Evaluation triggered by job "api-v3"
    Evaluation within deployment: "ba4c31c8"
    Evaluation status changed: "pending" -> "complete"
==> Evaluation "7e583065" finished with status "complete"

[root@danny-nomad-server-1 nomad]# ./nomad status
ID        Type     Priority  Status          Submit Date
api-v3    service  50        dead (stopped)  09/03/17 01:11:09 UTC
Nomad UI
It can be hard to remember of all the CLI commands Nomad provides. A pretty GUI goes a long way to fixing this. hashi-ui is the one HashiCorp recommends, and I think it’s definitely worth setting up. Again, since we’re using Consul, it’s dead simple to set up. I ran it on my Consul/Nomad server node. All you need to do is unzip the release, and start it up, telling it to connect to Nomad and Consul:
./hashi-ui-linux-amd64 --nomad-enable --consul-enable
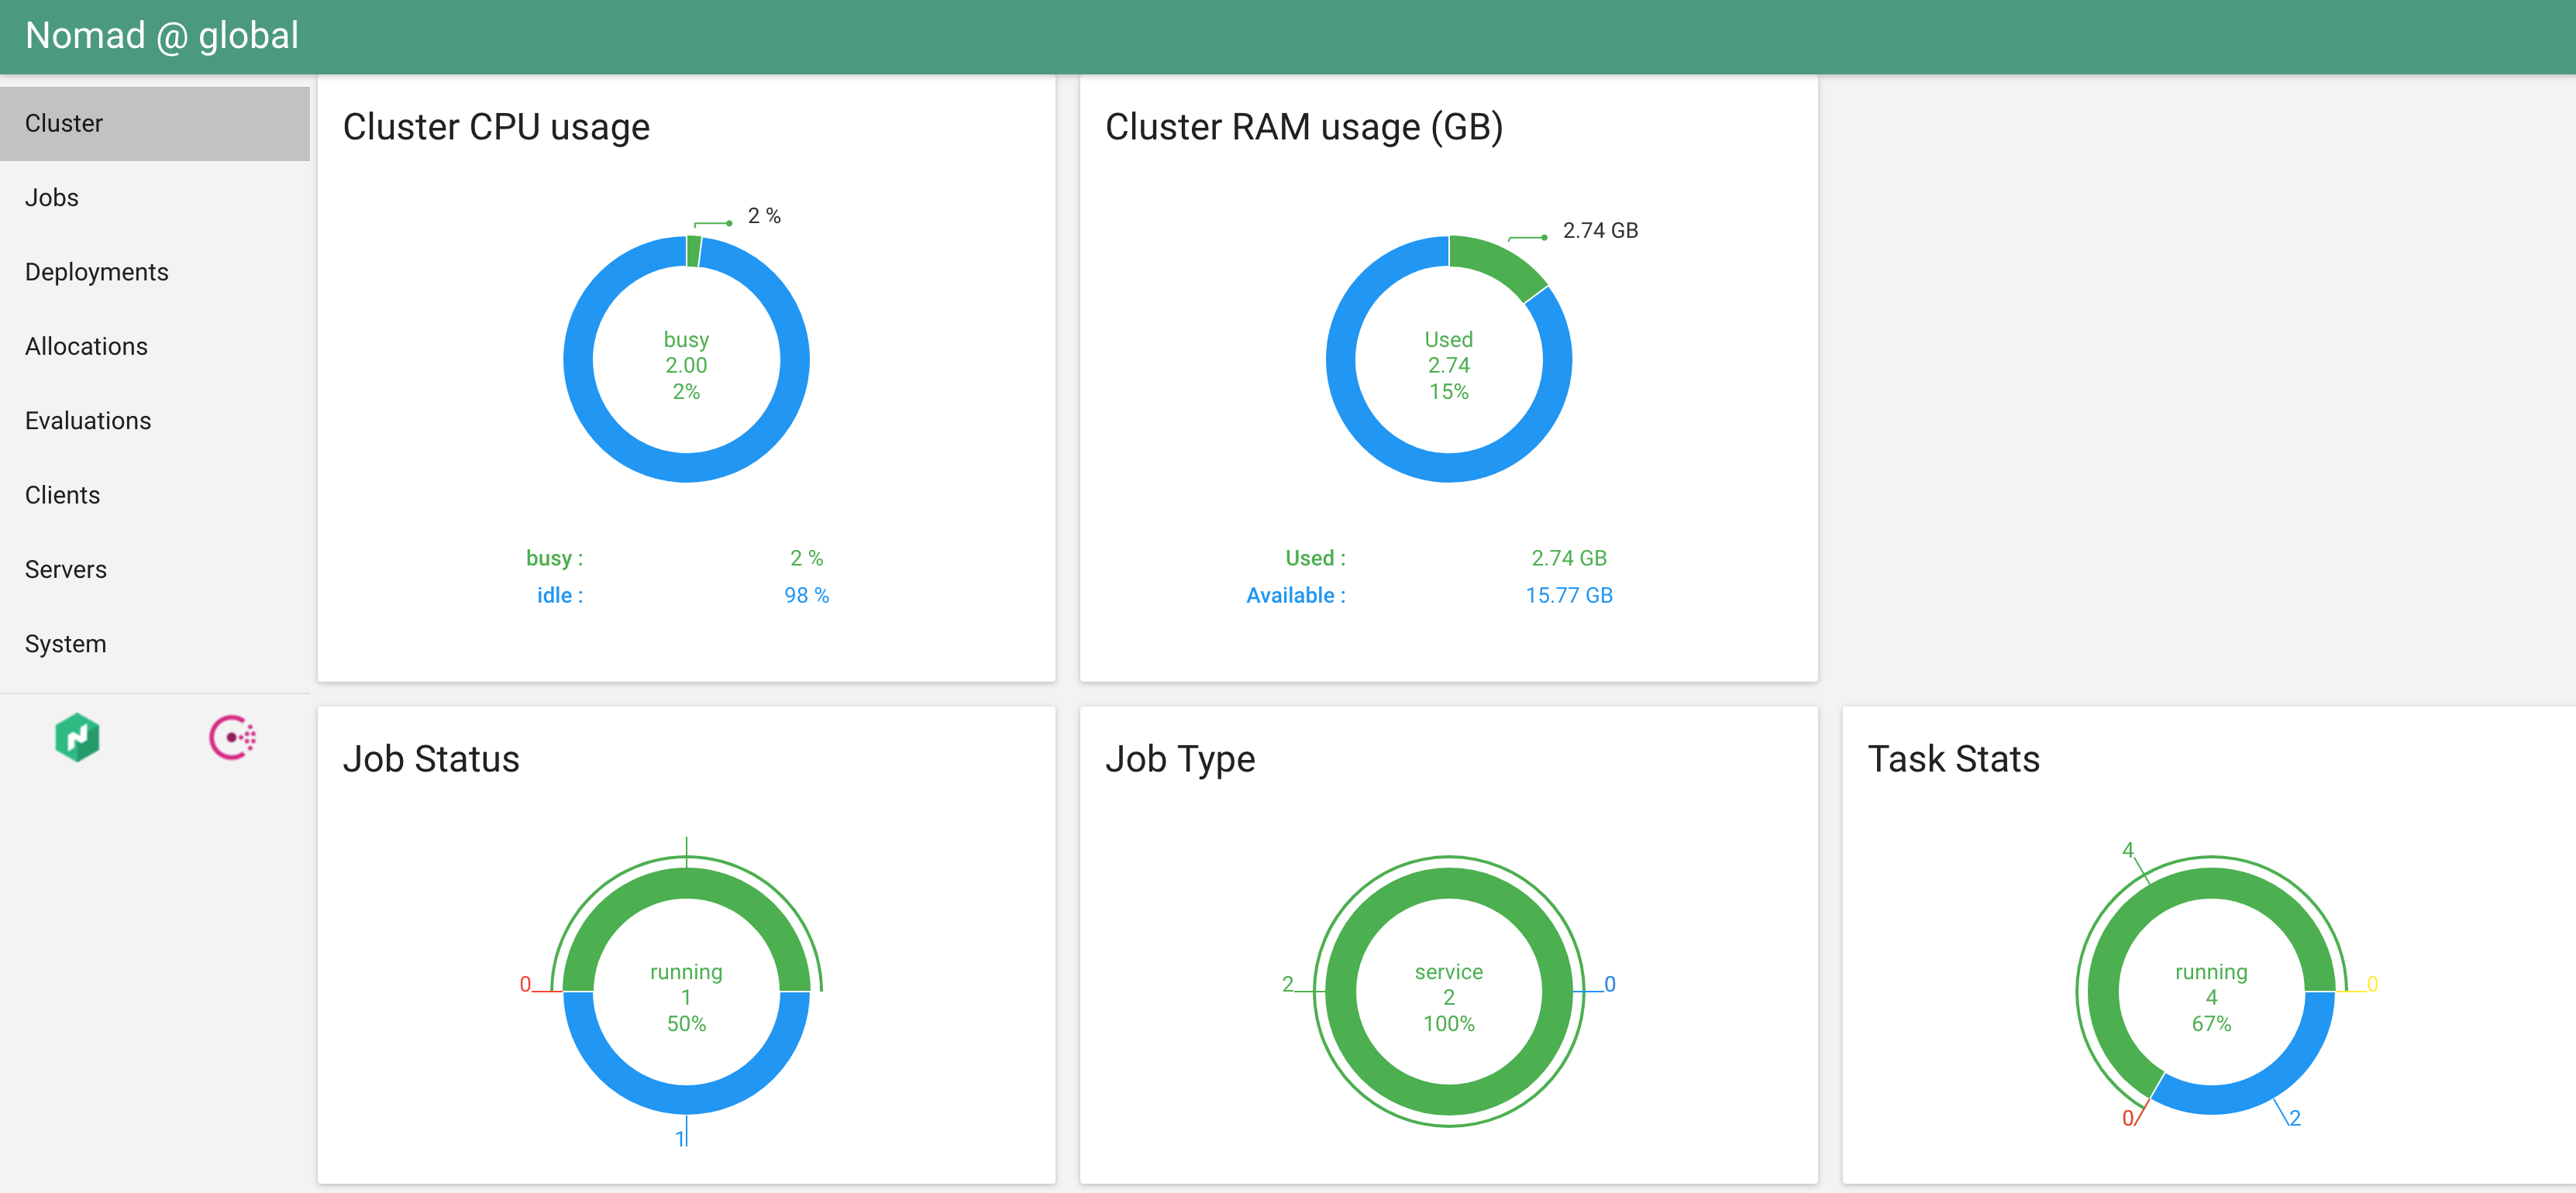
Once the UI starts, you can visit it on port 3000: http://$SERVER_IP:3000/nomad/global/cluster. You should see something that looks like:

The UI makes it much easier to see the overview of your cluster, and even allows you to approve deployments. I will leave it to you to explore.
Conclusion
In conclusion, I am very impressed with Nomad. I can definitely see multiple use cases for something like this on my team. The Consul integration piece is great, and removes some of the pain of a distributed scheduler. Things I like:
- as easy as advertised to configure and get working
- the native Java integration works well
- Consul integration is great, as we rely on this already
- we store our deployments as code (we sort of do this with Chef, but nowhere near as concise)
Things I need to explore more:
- how do I configure our edge load balancers to discover our edge services (LinkerD? connect everything to Consul?)
- how stateful apps behave inside Nomad
- authentication/authorization/management of jobs
- we have a huge team of devs I want to give access to - would like a way to manage this
Overall, I’m very excited to start using Nomad, and think it will fit our use case very well. More posts to come!
Next Steps
- Configure Nomad telemetry
- Automating all of this with Terraform (or some other tool)