Setting up a local P2Pool and mining Vertcoin with CCMiner
Overview
I’ve (along with everyone else recently) been fascinated with cryptocurrency recently, and have been learning more and more about it. One of the most interesting things to me is the act of mining the coins. I’ve played with mining in the past, but with all the new popularity, mining the well-known coins is basically impossible for the average person. There are many altcoins out there - almost too many to choose from. I’ve been doing some reading lately, and Vertcoin caught my eye. I recently spent some time setting up my own local P2Pool for Vertcoin, and pointing a miner at that local pool. This is meant to be a guide for:
- installing a wallet
- creating your own P2Pool server
- starting to mine using your pool
Everything in this guide is specific to Windows 10, but it should be similar for other platforms. I’m using CCMiner since I have Nvidia graphics cards.
Benefits of running your own P2Pool
There are many public Vertcoin pools out there for someone to use. The simplest mining setup would use a public pool, like Vertcoin Easy Mine. There are, however, some notable benefits to running your own:
- lower latency - since you’re on the same network (or even computer) as the pool, latency will go down, which means fewer dead on arrivals
- 0% fees - some (most) public pools charge a fee to use. A local pool will be free
- zero downtime - since you control the pool, you can keep it running as long as you like
- contribute to decentralization - Vertcoin (and other cryptocurrencies) need to be decentralized to survive
Now that’s done, we’re ready for the first step.
Vertcoin wallet
The Vertcoin wallet is what holds all your coins, so make sure to password protect/encrypt/back it up. I won’t go in to detail about that here - there are other guides on it.
Installing Vertcoin wallet
Before you can start mining or start your own pool, you need to install the Vertcoin wallet. You can find the wallet on the Vertcoin github releases page. Make sure you pick the proper OS. I set up my pool on a Windows machine, so I chose vertcoin-v0.12.0-windows-64bit.zip. Once it’s downloaded:
- unzip the file
- open the
vertcoin-qt.exe - it should ask for you an install location, it’s ok to keep this all default
- it should start syncing the blockchain (this will take approximately forever)
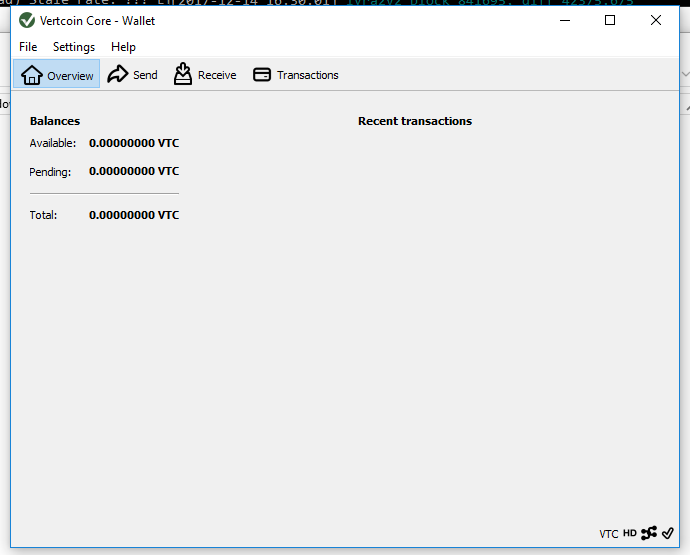
Once the syncing is done, you should see a clean wallet like so:

Create a receive address
In order to receive the coins you mine, you’ll need to create a receive address. In the wallet, click the “receive” tab. You should see a form like:

You don’t have to fill any of these out, but I use one address for mining - that way I know where the transactions come from. I used these values:
- Label: “miner”
- Amount: leave blank
- Message: “received from mining”
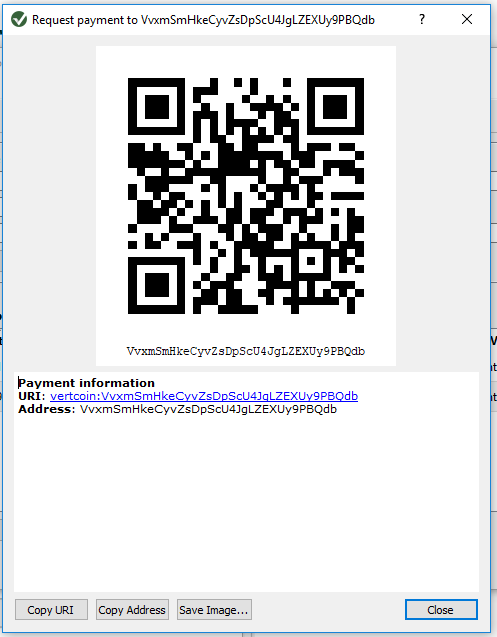
Then click the receive payment button - a box should appear with a QR code and address. Go ahead and close this for now - the information will be available later by navigating back to the receive tab.

Configure the miner rpc connections
Next, we need to configure our wallet to listen for local rpc connections from a pool. The pool uses to wallet to communicate with the blockchain, so both must be running at the same time. In the wallet:
- click “Settings”
- click “Options”
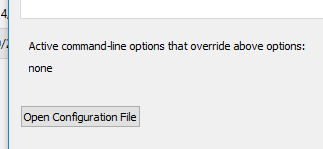
- click “Open Configuration File”

This configuration file should open in something like Notepad, and it should be blank. Add the following text:
server=1
rpcuser=myuser
rpcpassword=verystrongpasswordnobodycanguess
Save the file, and restart the Vertcoin wallet. We’re now ready to install P2Pool.
Installing P2Pool
The P2Pool binaries are located in the Github Releases section once again. Download the latest release (in my case it was v0.1.1). You will need to unzip the file once it’s downloaded. Inside the unzipped folder, you should see a Windows batch file titled something like Start P2Pool Network 2. You can either choose to edit this file, or create another batch file inside this folder to start the pool. In the file, add this:
run_p2pool.exe --net vertcoin2 myuser verystrongpasswordnobodycanguess $wallet_address -w $local_ip:port
More options are documented here if you need to tweak it even more.
$wallet_address will be the address you received earlier, when clicking “receive” in the wallet. -w $local_ip:port isn’t strictly needed - but I wanted to make sure it started up on the right IP address and used a port that I wanted (I used 9999 in my case to remember easily.) Save and close the file.
Now, run the batch file. You should see the pool start up with messages similar to:
C:\Users\MINING\Downloads\p2pool-vtc-WIN64\p2pool-vtc>run_p2pool.exe --net vertcoin2 myuser verystrongpasswordnobodycanguess $wallet_address -w $local_ip:port
2017-12-14 16:57:00.523000 p2pool (version 3d0f826-dirty)
2017-12-14 16:57:00.524000
2017-12-14 16:57:00.524000 Testing bitcoind RPC connection to 'http://127.0.0.1:5888/' with username 'user'...
2017-12-14 16:57:00.541000     ...success!
2017-12-14 16:57:00.542000     Current block hash: 58a9c1ee25525b229cc0ef23b668d4f34e15890da1a01bc6cca4eb7162f94ecc
2017-12-14 16:57:00.542000     Current block height: 841701
2017-12-14 16:57:00.542000
2017-12-14 16:57:00.542000 Testing bitcoind P2P connection to '127.0.0.1:5889'...
2017-12-14 16:57:00.544000     ...success!
2017-12-14 16:57:00.544000
2017-12-14 16:57:00.545000 Determining payout address...
2017-12-14 16:57:00.545000     ...success! Payout address: Vw9utVuAm9wRxcBDDLGVfsGs7QXB6xP3oe
2017-12-14 16:57:00.545000
2017-12-14 16:57:00.545000 Loading shares...
Once the pool starts, you will also see message about the global hashing rate:
2017-12-14 16:59:45.665000  Shares: 0 (0 orphan, 0 dead) Stale rate: ??? Efficiency: ??? Current payout: (0.0000)=0.0000 VTC
2017-12-14 16:59:45.665000  Pool: 127GH/s Stale rate: 15.2% Expected time to block: 23.7 minutes
2017-12-14 16:59:46.970000 Punishing share for 'Block-stale detected! height(b79db16c219589f65f4ca6782f8a07129e8f86f2f95ccda7a8ad517eb63160ae) < height(fbe6aa7f649150c2a8da4ae834ff912b4c8726877ba727e445b2d69ef327e789) or 1b018c96 != 1b018c98'! Jumping from b1b065c0 to 0e592982!
2017-12-14 16:59:46.974000 Punishing share for 'Block-stale detected! height(b79db16c219589f65f4ca6782f8a07129e8f86f2f95ccda7a8ad517eb63160ae) < height(fbe6aa7f649150c2a8da4ae834ff912b4c8726877ba727e445b2d69ef327e789) or 1b018c96 != 1b018c98'! Jumping from b1b065c0 to 0e592982!
2017-12-14 16:59:48.668000 P2Pool: 17788 shares in chain (13713 verified/17793 total) Peers: 6 (0 incoming)
2017-12-14 16:59:48.669000  Local: 111MH/s in last 33.7 seconds Local dead on arrival: ~0.4% (0-3%) Expected time to share: 6.5 hours
2017-12-14 16:59:48.669000  Shares: 0 (0 orphan, 0 dead) Stale rate: ??? Efficiency: ??? Current payout: (0.0000)=0.0000 VTC
2017-12-14 16:59:48.670000  Pool: 127GH/s Stale rate: 15.2% Expected time to block: 23.7 minutes
2017-12-14 16:59:49.858000 New work for worker! Difficulty: 0.500000 Share difficulty: 9745.649764 Total block value: 25.002251 VTC including 4 transactions
This means your pool is working! We’re now ready to connect CCMiner and start mining.
Installing CCMiner
CCMiner is a utility for mining on Nvidia graphics cards. If you don’t have Nvidia, you may need to use something else, like the Vertcoin one-click miner.
Installing CCMiner is as easy as navigtaing to the Github Release page again. Find the release for your OS, for me it’s ccminer-x86-2.2.3-cuda9.7z. Go ahead and download this file, and unzip it. You may need to install 7zip to unzip if you don’t already have it. Inside the CCMiner folder will be a Windows batch file titled something like RUN-CREA - you can either edit this file or create a new batch file to run. Inside the file, add:
ccminer-x64 -a lyra2v2 -i 20 -o stratum+tcp://$local_ip:$port -u $wallet_address -p any_word_here
The $local_ip will be the IP of your pool. In my case it’s a 192.168 address because that’s what I told it to bind on. If you’re mining on the same computer as the wallet, you can probably use 127.0.0.1. The port is the same - use the port you told the pool to use. Make sure you set you wallet address so you can get paid, and set -p to any random identifier.
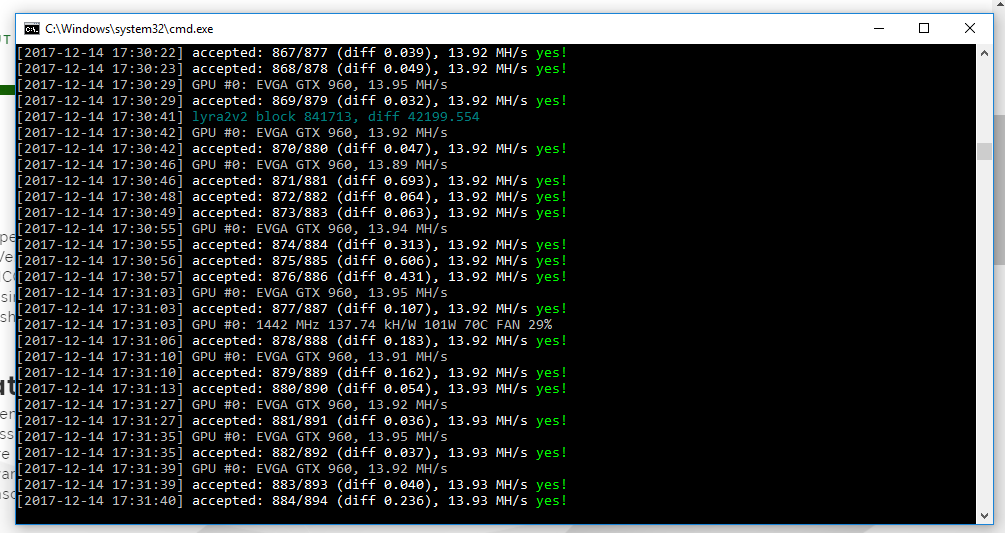
Now your miner should start! You should see accepted shares if everything is working properly:

Conclustion
Hopefully this was helpful! I’m just getting started so if anyone has any tips/tricks let me know!